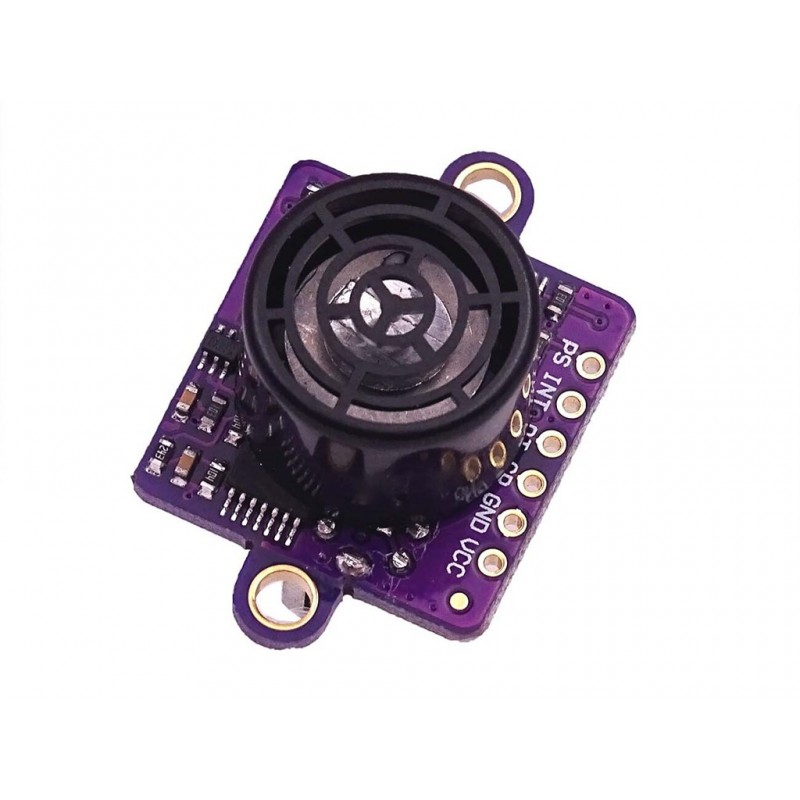
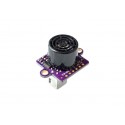
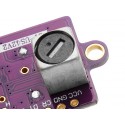
Gy Us42 I2C Pixhawk Apm Flight Control Ultrasonic Distance Measurement Module
Rs. 809.00 Rs. 996.00
- Brand: https://www.maxbotix.com/product-category/i2cxl-maxsonar-ez-prod
- Product Code: SEN-ULTRA
- Availability: In Stock
- Price in reward points: 10
- For Bulk Order
 9962060070
| SPECIFICATIONS: | |
| Measuring range | 20cm ~ 720cm (VCC = 5V) |
| Resolution | 1cm |
| Response frequency | 15HZ (full range) |
| Working voltage | 3-5V |
| Working current | 9mA (VCC = 5V) |
| Operating temperature | -20 degrees Celsius ~ 65 degrees Celsius |
| Storage temperature | -40 degrees Celsius to 85 degrees Celsius |
| Size | 21.5 x 21 x 24.5mm |
OVERVIEW:
-Power supply 3-5V
-Built-in MCU calculates the distance
-IIC, serial port, PWM communication format
-Close 40HZ measurement cycle
-With the corresponding PC software
-Integrated probe, small size
PACKAGE INCLUDES:
1 PCS x Gy Us42 I2C Pixhawk Apm Flight Control Ultrasonic Distance Measurement Module
https://www.maxbotix.com/product-category/i2cxl-maxsonar-ez-products
https://ardupilot.org/copter/docs/common-rangefinder-maxbotixi2c.html
//SOURCE CODE TAKEN FROM BELOW LINK
//https://www.maxbotix.com/articles/095.htm#loading
/* Arduino I2C for a MaxSonar */
//////////////////////////////////////////////////////////////////////////
// Arduino I2C for a MaxSonar by Carl Myhre is licensed under a //
// Creative Commons Attribution-ShareAlike 4.0 International License. //
// Original Author: Carl Myhre, 10-02-2014, Revision: 1.0 //
// Modifications by: //
// //
// Revision History: 1.0 -- 10-02-2014 -- Created initial code build //
// //
// The original I2C libraries were created by Peter Fleury //
// http://homepage.hispeed.ch/peterfleury/avr-software.html //
// //
// These libraries were adapted by Bernhard Nebel for use on Arduino //
// https://github.com/felias-fogg/SoftI2CMaster //
// //
// Special Thanks to MaxBotix Inc. for sponsoring this project! //
// http://www.maxbotix.com -- High Performance Ultrasonic Sensors //
// //
// For more information on installing the I2C libraries for Arduino //
// visit http://playground.arduino.cc/Main/SoftwareI2CLibrary //
//////////////////////////////////////////////////////////////////////////
//Hints on installing this code:
// 1. You will need to install the <SoftI2CMaster.h> library before using this code.
// On Windows, the files are placed in C:\Program Files (x86)\Arduino\libraries\SoftI2CMaster\
// 2. As of 10-02-14 the Arduino library page (reference above) has the wrong name for the include file
// it lists <SoftI2C.h> instead of <SoftI2CMaster.h> -- use the one that matches your installation.
// 3. Make sure to load the library into the Arduino compiler.
// To do this go to: SKETCH >> IMPORT LIBRARY... >> ADD LIBRARY...
// Then navigate to C:\Program Files (x86)\Arduino\libraries\SoftI2CMaster\SoftI2CMaster.h
// 4. Be sure to set the SCL and SDA pins so that they match the pins you are using.
// 5. I have included 3 working "code examples" which differ from the 3 "functions" I included.
// The functions are all that should be required to quickly use the I2C library to talk to a MaxSonar.
// The three code examples show how I would implement each of the common tasks you may wish to do.
// 6. The included functions are as follows:
// A. start_sensor(addr)
// B. read_sensor(addr)
// C. change_address(oldaddr,newaddr)
// 7. The included code examples are as follows:
// A. read_the_sensor_example()
// B. address_polling_example()
// C. default_address_change_example()
// 8. You do not have to keep track of the error codes passed out by the installed functions if you do not want to.
// I inluded the error tracking so that it was easy for others to build a reliable system -- and to ease
// troubleshooting. (not using it makes for cleaner code if you trust your interface)
/*
Below, I define the SCL and SDA pins by their ATMEGA pins I have included links to common mappings below.
UNO: http://arduino.cc/en/Hacking/PinMapping168
NANO: (matches UNO but has fewer pins)
MEGA 2560: http://arduino.cc/en/Hacking/PinMapping2560
The current data matches the setup for the Arduino Uno -- they may need to be changed if the hardware changes.
You can also switch the I2C interface
to any of the tristate pins that you want (not just the SDA or SCL pins).
*/
#define SCL_PIN 5 //Default SDA is Pin5 PORTC for the UNO -- you can set this to any tristate pin
#define SCL_PORT PORTC
#define SDA_PIN 4 //Default SCL is Pin4 PORTC for the UNO -- you can set this to any tristate pin
#define SDA_PORT PORTC
#define I2C_TIMEOUT 100 //Define a timeout of 100 ms -- do not wait for clock stretching longer than this time
/*
I have included a couple of extra useful settings for easy reference.
//#define I2C_CPUFREQ (F_CPU/8)//Useful if you plan on doing any clock switching
#define I2C_FASTMODE 1 //Run in fast mode (400 kHz)
#define I2C_SLOWMODE 1 //If you do not define the mode it will run at 100kHz with this define set to 1 it will run at 25kHz
*/
#include <SoftI2CMaster.h> //You will need to install this library
void setup(){
// Initialize both the serial and I2C bus
Serial.begin(9600);
i2c_init();
// (OPTIONAL) Check each address for a sensor
address_polling_example();
/*
Note that I placed the address change example in setup() for a good reason.
Changing the sensor address causes an EEPROM write, there should only be ~1,000,000+
of these writes to the sensor microcontroller over its product lifetime.
Changing the address is fine, but doing it every second for the next 4 years may
cause reliability issues.
*/
// (OPTIONAL) Run an address change example
default_address_change_example();
// Your code here
}
void loop()
{
// (OPTIONAL) Read a sensor at the default address
read_the_sensor_example();
// Your code here
}
///////////////////////////////////////////////////
// Function: Start a range reading on the sensor //
///////////////////////////////////////////////////
//Uses the I2C library to start a sensor at the given address
//Collects and reports an error bit where: 1 = there was an error or 0 = there was no error.
//INPUTS: byte bit8address = the address of the sensor that we want to command a range reading
//OUPUTS: bit errorlevel = reports if the function was successful in taking a range reading: 1 = the function
// had an error, 0 = the function was successful
boolean start_sensor(byte bit8address){
boolean errorlevel = 0;
bit8address = bit8address & B11111110; //Do a bitwise 'and' operation to force the last bit to be zero -- we are writing to the address.
errorlevel = !i2c_start(bit8address) | errorlevel; //Run i2c_start(address) while doing so, collect any errors where 1 = there was an error.
errorlevel = !i2c_write(81) | errorlevel; //Send the 'take range reading' command. (notice how the library has error = 0 so I had to use "!" (not) to invert the error)
i2c_stop();
return errorlevel;
}
///////////////////////////////////////////////////////////////////////
// Function: Read the range from the sensor at the specified address //
///////////////////////////////////////////////////////////////////////
//Uses the I2C library to read a sensor at the given address
//Collects errors and reports an invalid range of "0" if there was a problem.
//INPUTS: byte bit8address = the address of the sensor to read from
//OUPUTS: int range = the distance in cm that the sensor reported; if "0" there was a communication error
int read_sensor(byte bit8address){
boolean errorlevel = 0;
int range = 0;
byte range_highbyte = 0;
byte range_lowbyte = 0;
bit8address = bit8address | B00000001; //Do a bitwise 'or' operation to force the last bit to be 'one' -- we are reading from the address.
errorlevel = !i2c_start(bit8address) | errorlevel;
range_highbyte = i2c_read(0); //Read a byte and send an ACK (acknowledge)
range_lowbyte = i2c_read(1); //Read a byte and send a NACK to terminate the transmission
i2c_stop();
range = (range_highbyte * 256) + range_lowbyte; //compile the range integer from the two bytes received.
if(errorlevel){
return 0;
}
else{
return range;
}
}
/////////////////////////////////////////
// Function: Change the sensor address //
/////////////////////////////////////////
//Uses the I2C library to change the address of a sensor at a given address
//Collects and reports an error bit where: 1 = there was an error or 0 = there was no error.
//INPUTS: byte oldaddress = the current address of the sensor that we want to change
//INPUTS: byte newddress = the address that we want to change the sensor to
//OUPUTS: bit errorlevel = reports if the function was successful in changing the address: 1 = the function had an
// error, 0 = the function was successful
boolean change_address(byte oldaddress,byte newaddress){
//note that the new address will only work as an even number (odd numbers will round down)
boolean errorlevel = 0;
oldaddress = oldaddress & B11111110; //Do a bitwise 'and' operation to force the last bit to be zero -- we are writing to the address.
errorlevel = !i2c_start(oldaddress) | errorlevel; //Start communication at the new address and track error codes
errorlevel = !i2c_write(170) | errorlevel; //Send the unlock code and track the error codes
errorlevel = !i2c_write(165) | errorlevel; //Send the unlock code and track the error codes
errorlevel = !i2c_write(newaddress) | errorlevel; //Send the new address
i2c_stop();
return errorlevel;
}
//////////////////////////////////////////////////////////
// Code Example: Read the sensor at the default address //
//////////////////////////////////////////////////////////
void read_the_sensor_example(){
boolean error = 0; //Create a bit to check for catch errors as needed.
int range;
//Take a range reading at the default address of 224
error = start_sensor(224); //Start the sensor and collect any error codes.
if (!error){ //If you had an error starting the sensor there is little point in reading it as you will get old data.
delay(100);
range = read_sensor(224); //reading the sensor will return an integer value -- if this value is 0 there was an error
Serial.print("R:");Serial.println(range);
}
}
////////////////////////////////////////////////////////////////
// Code Example: Poll all possible addresses to find a sensor //
////////////////////////////////////////////////////////////////
void address_polling_example(){
boolean error = 0; //Create a bit to check for catch errors as needed.
int range = 0;
Serial.println("Polling addresses...");
//Walk through all possible addresses and check for a device that can receive the range command and will
// return two bytes.
for (byte i=2; i!=0; i+=2){ //start at 2 and count up by 2 until wrapping to 0. Checks all addresses (2-254) except 0 (which cannot be used by a device)
error = 0;
error = start_sensor(i); //Start the sensor and collect any error codes.
if (!error){ //If you had an error starting the sensor there is little point in reading it.
delay(100);
range = read_sensor(i); //reading the sensor will return an integer value -- if this value is 0 there was an error
Serial.println(i);
if (range != 0){
Serial.print("Device found at:");Serial.print(i);Serial.print(" Reported value of:");Serial.println(range);
}
}
else{
Serial.print("Couldn't start:");Serial.println(i);
}
}
Serial.println("Address polling complete.");
}
//////////////////////////////////////////////
// Code Example: Change the default address //
//////////////////////////////////////////////
void default_address_change_example(){
boolean error = 0; //Create a bit to check for catch errors as needed.
int range;
Serial.println("Take a reading at the default address");
//Take a range reading at the default address of 224
error = start_sensor(224); //Start the sensor and collect any error codes.
if (!error){ //If you had an error starting the sensor there is little point in reading it.
delay(100);
range = read_sensor(224); //reading the sensor will return an integer value -- if this value is 0 there was an error
Serial.print("R:");Serial.println(range);
}
Serial.println("Change the sensor at the default address to 222");
//Change the address from 224 to 222
error = 0;
error = change_address(224,222); //Change the address -- I don't do anything with the error handler at this point but you can if you want.
delay(200); //Wait 125ms for the sensor to save the new address and reset
Serial.println("Take a reading at the new address");
//Take a range reading at the new address of 222
error = 0;
error = start_sensor(222); //Same as above but at the new address
if (!error){
delay(100);
range = read_sensor(222);
Serial.print("N:");Serial.println(range);
}
Serial.println("Change the sensor back to the default address");
//Change the address from 222 to 224
error = 0;
error = change_address(222,224);
delay(200); //Wait 125ms for the sensor to save the new address and reset
}
15 days

